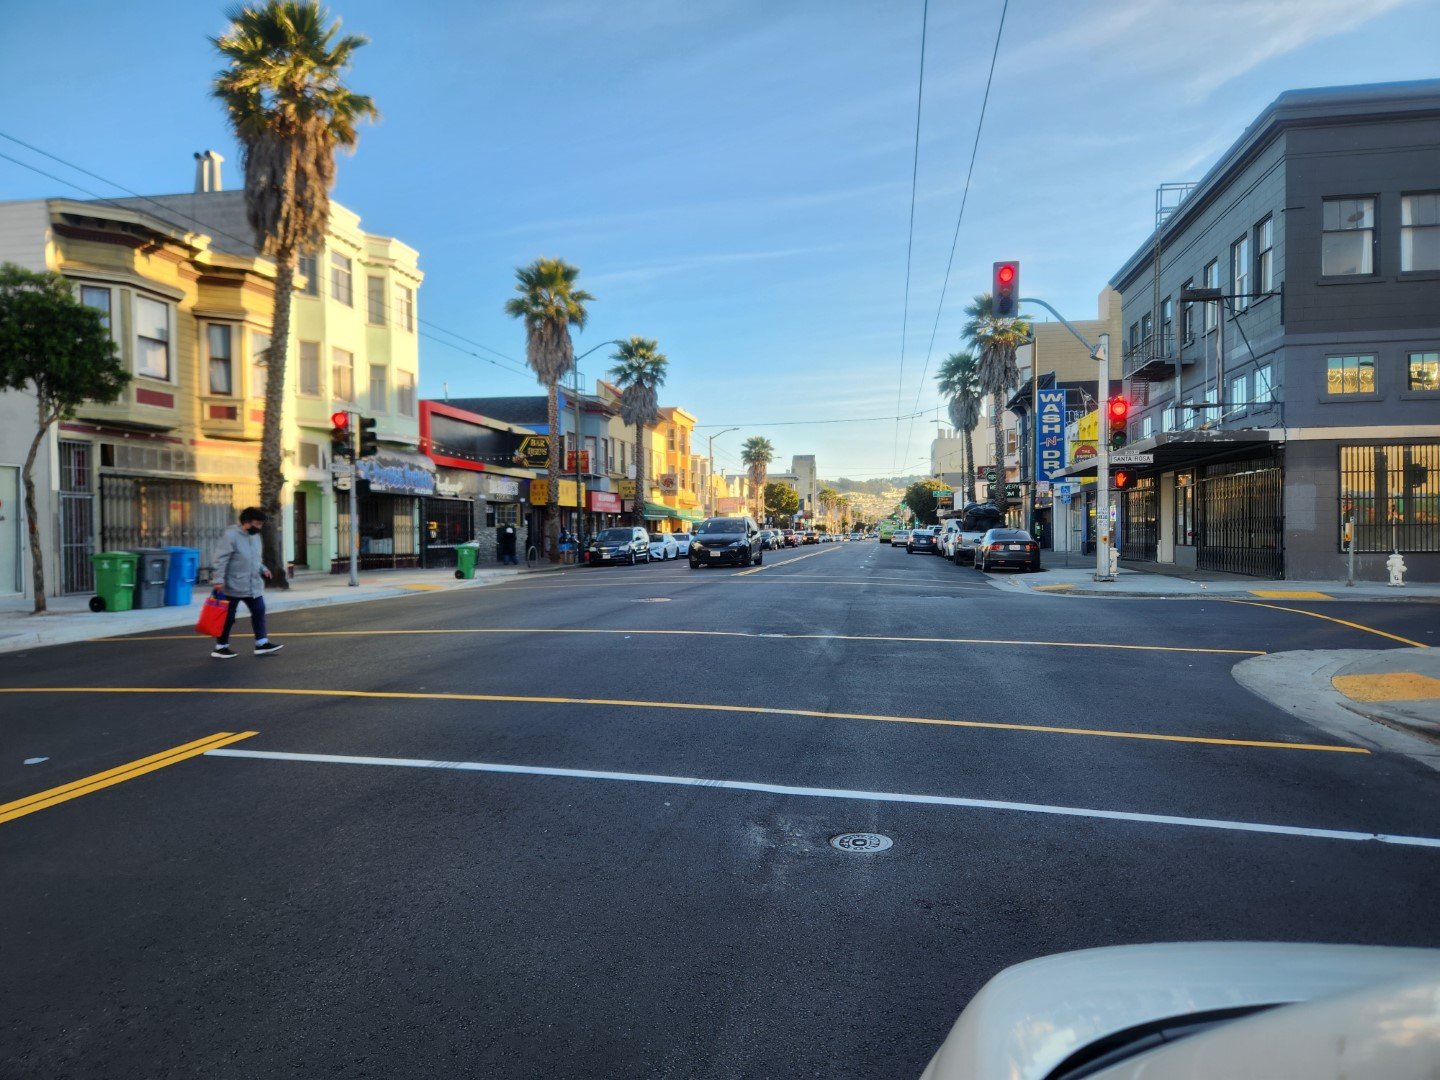
Sooner or later you figure out the plan. Starting at Geneva and Mission and heading north they are repaving the bus stops with concrete. It is about time. News from SF – The Quarterly Report – May 2024
San Francisco Road Repairs
The edges of cities often are the places that get very little love from the local government. Parks often are forgotten about. Bus stops are not maintained. Roads become filled with potholes. However, in San Francisco a remarkable thing has happened. In the hinterlands, in a neighborhood on the south side of town, they have spent two years slowly redoing the main thoroughfare Mission Street otherwise know as El Camino Real starting at Geneva Ave and making their way to Silver Street. In the process they seem to have updated some sewers and waterlines. The bus stops are now all solid fresh concrete. I asked an Asian bus driver waiting for passengers behind the wheel of a Mission 14 bus heading north what he thought of the new El Camino Real. He said “Mo beddar, no bouncing,” and gave a chuckle. Indeed, the expense for tires and shocks on these buses, like the Mission 14, will be way less for the city. I do not have the exact numbers but the last time they repaved Mission Street in the Excelsior was at least thirty years ago. It looked like this in June of 2023.
Mission Street at Excelsior 6/2023
No ribbon cutting ceremony. No mention in the local press. Life continues at its furious pace. And so it goes.
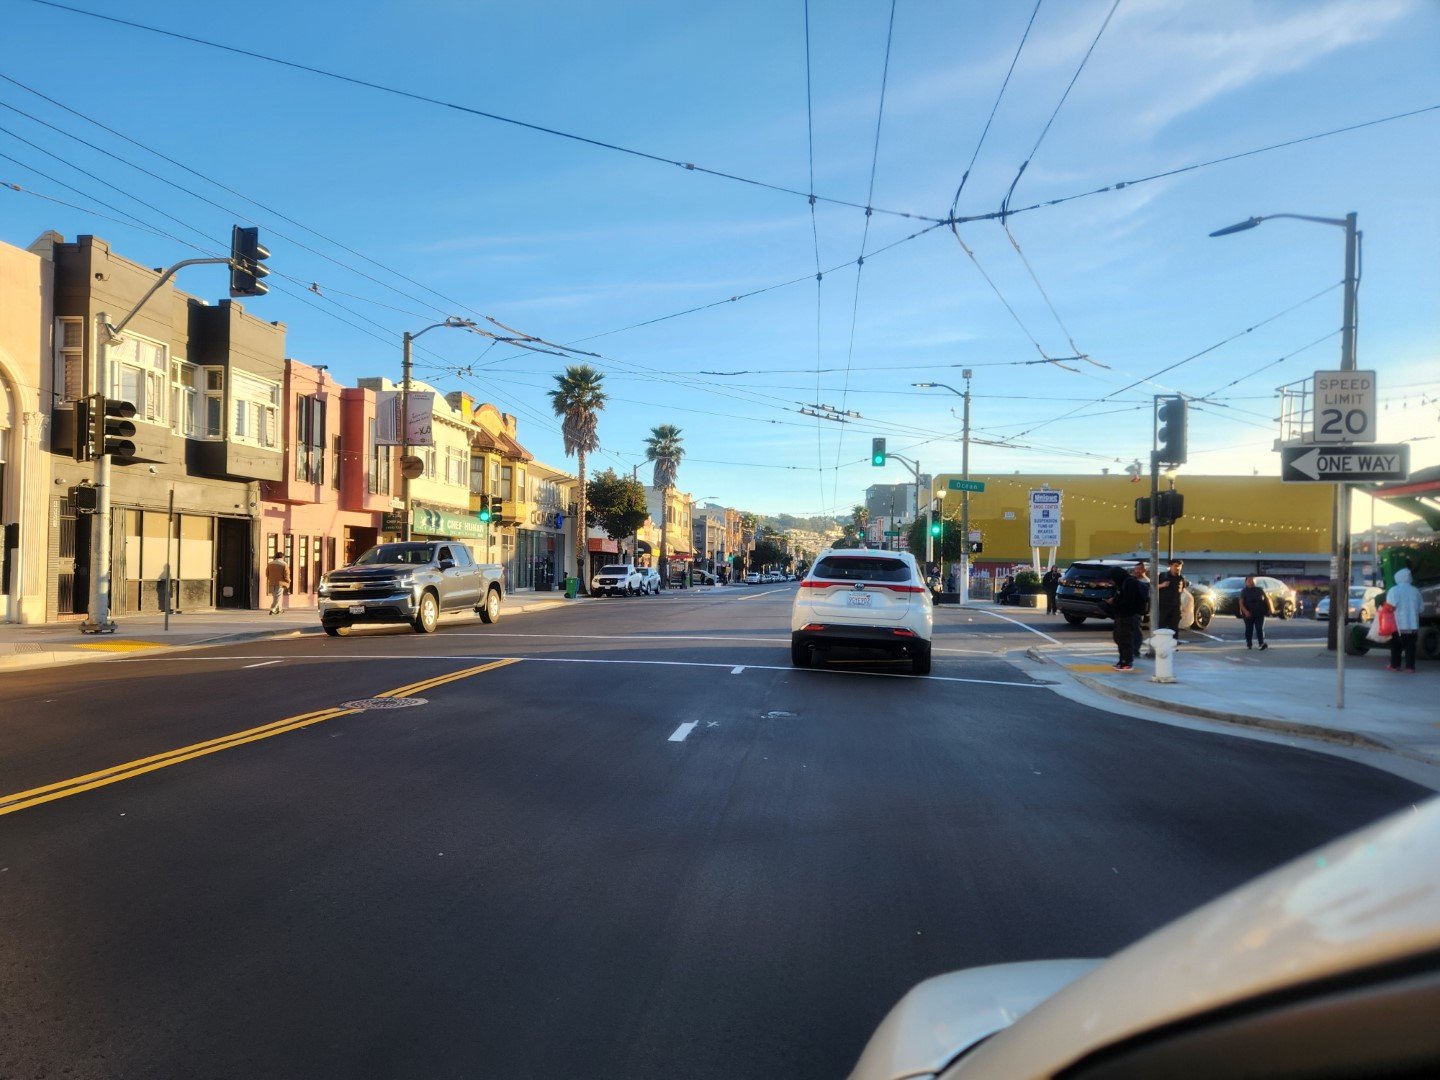
The Newly Paved Mission Street at Ocean Ave.
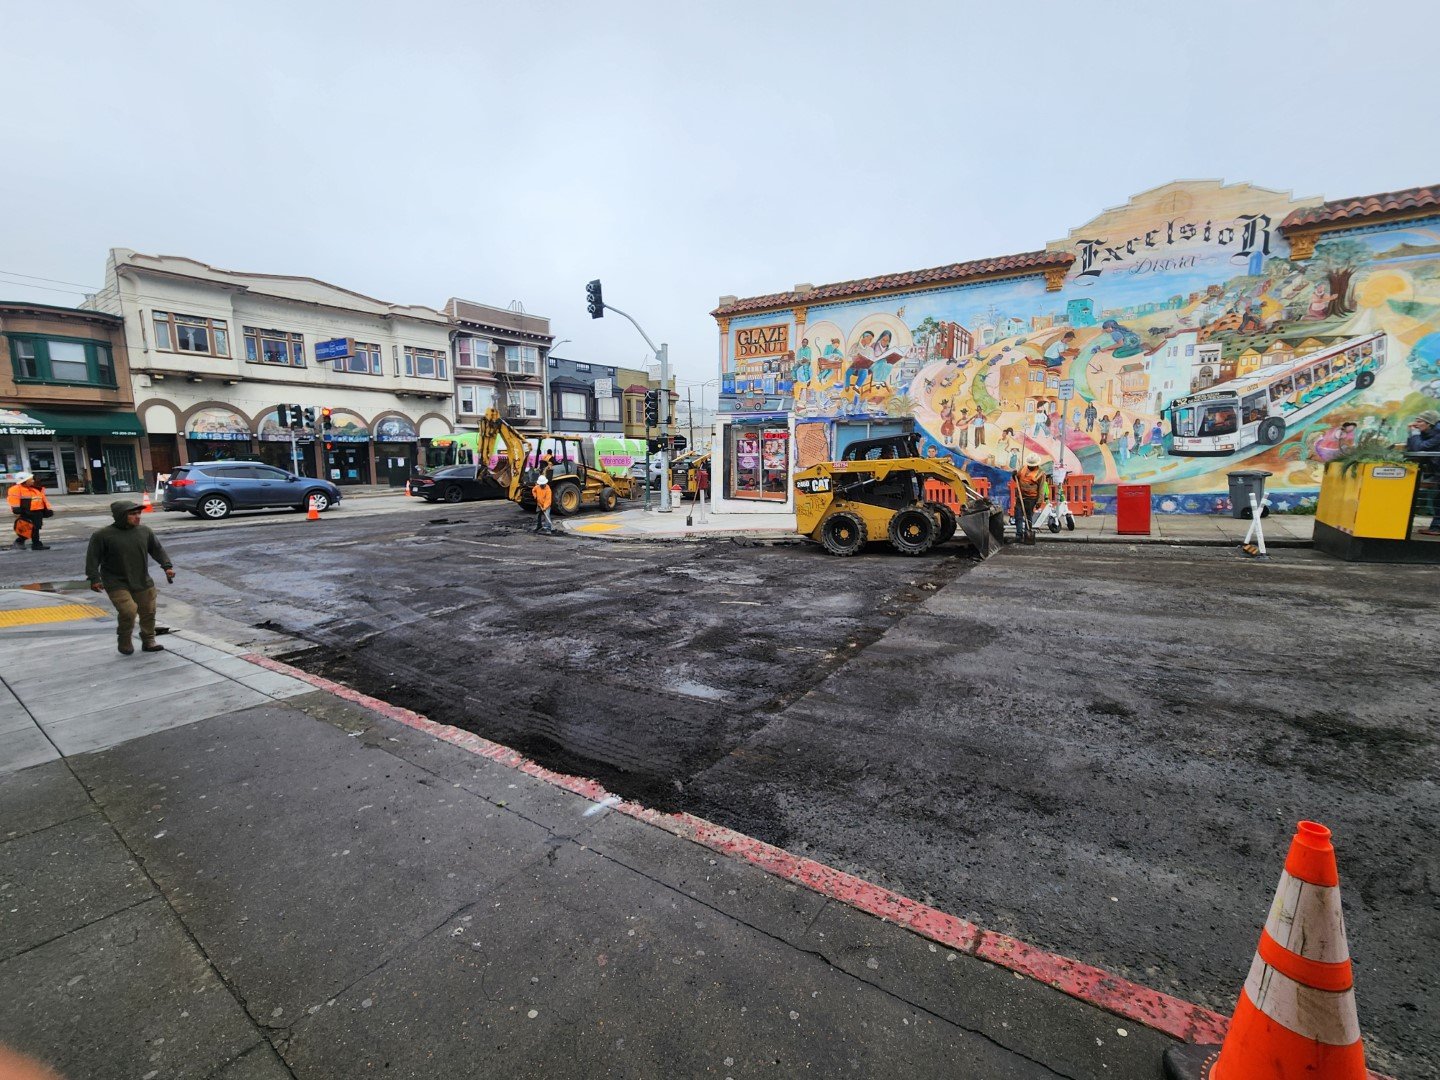
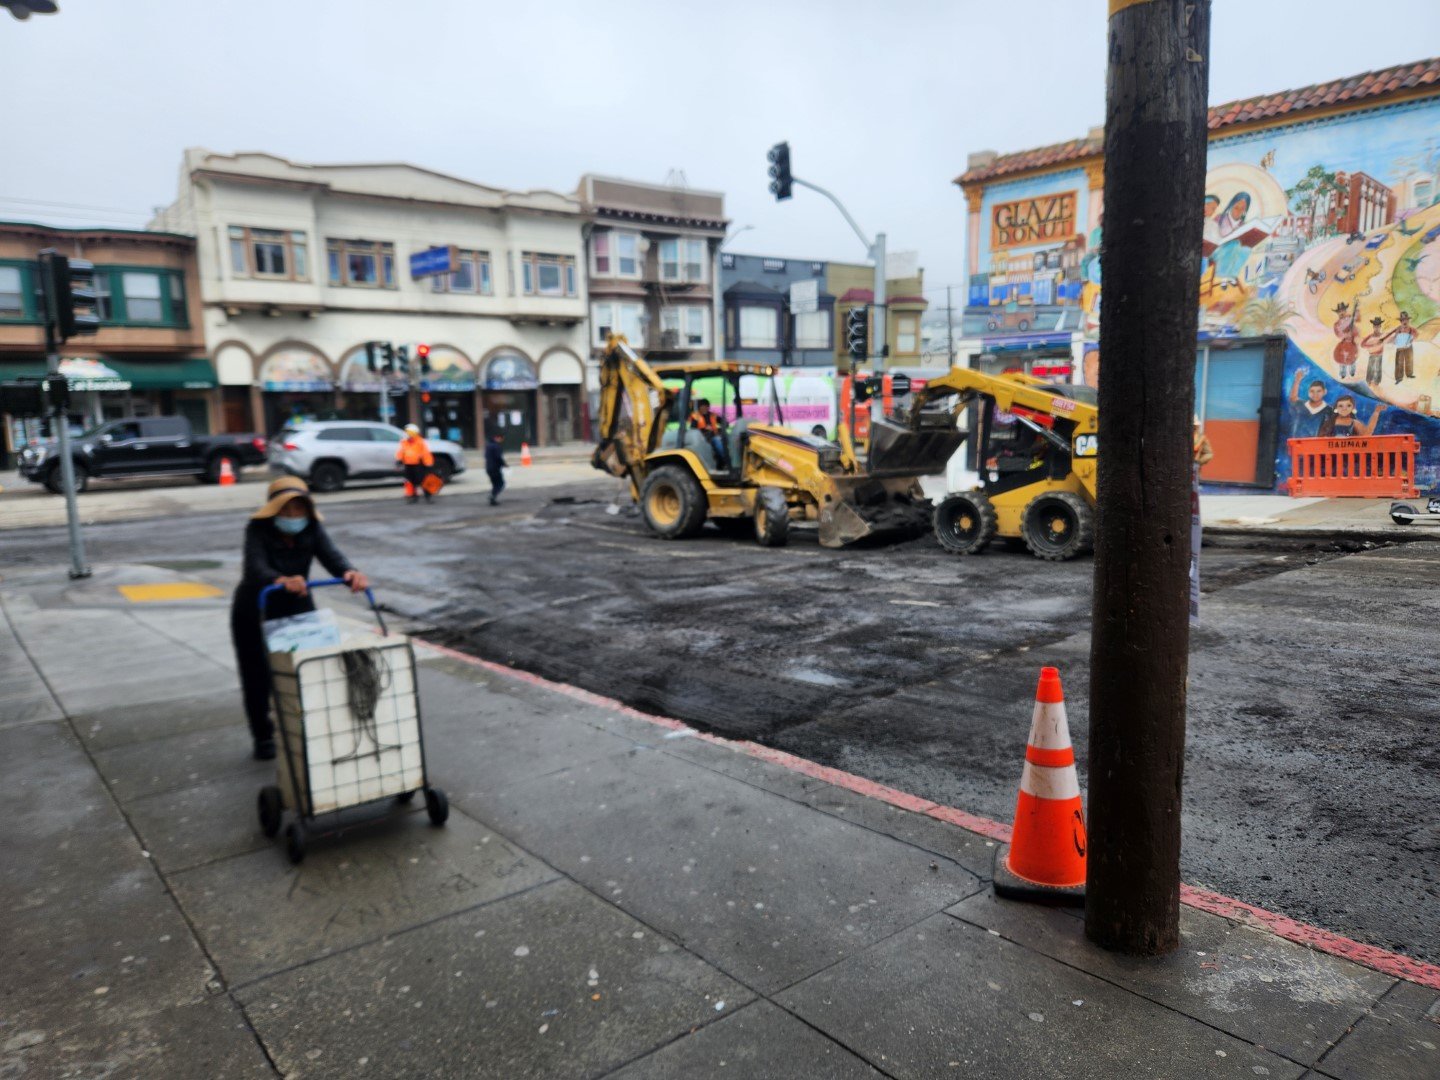
Mission Street Excelsior road repair
Mission Street Excelsior road repair
Mission Street Excelsior road repair
Mission Street Excelsior road repair
Mission Street Excelsior road repair
Mission Street Excelsior road repair
Mission Street Excelsior road repair
Parking Tickets, Do Not Park Signs and Other Treacherous Endeavors
San Francisco now has many areas that have two hour parking from 8AM to 9PM. This is such a draconian idea. How is anyone going to have a good time in this town? The Street Cleaning ticket is now $90. Overtime Meter Parking Outside Downtown Core is now $92. For a complete list see San Francisco Parking Fines List.
It does make taking the bus or riding a bike a lot more attractive.
It is treacherous out there. Remember to plug your meters and read the signs. Be nice to people walking around in a daze looking at their cellphones, crossing the street without looking. Also, sometimes people do have to park on a busy street. This means that they have to parallel park and it may slow traffic down for a minute. Be kind.
The Quarterly Report: A brief synopsis of the news in San Francisco over the last three months. You are now reading “Slow News That Doesn’t Break” – the exotic internet.
Weather
April turned into May and now it is June. Summer in San Francisco has begun. Along the coast you often have a marine layer, otherwise known as fog. This marine layer will sometimes burn off in the afternoon and then we get the strong onshore northwest winds. It is a time for morning walks and afternoon kiteboarding. The surf season is pretty much over until the fall as most days the ocean is blown out. If you are visiting San Francisco, bring a light jacket and layers, maybe even a beanie. Summer is great time of year to walk along the Embarcadero or better yet to visit wine country where it is much warmer. If you have more time, head to mountains and enjoy the streams and lakes.
Sunset lighting San Francisco City Hall
National Politics
Nothing to report on the national politics front that you probably do not already know. The news cycle is manufactured for the attention span of gnats. The current president is a cunning and treacherous man (pay not attention to that strange man behind the curtain). His weird notion that raising tariffs will bring back manufacturing is silly and naïve and more of a marketing play for some nostalgic bygone era. In the twentieth century, the growth of U.S. manufacturing was a decades-long process. We have sold all the manufacturing equipment to Mexico, China and Brazil (Punching Out – One Year in a Closing Auto Plant by Paul Clemens).
Matt Stoller in his Newsletter Big illuminates this slow news quite well.
In truth, America’s vast productive capacity was built on skill with machine tools, which are the specialized tools that cut, bore or bend metal. In the 20th century, it was America’s capacity to create factories that sparked the “arsenal of democracy,” and America led the world until the 1960s in machine tooling. We were a high productivity and high wage nation, and the basis was a fierce competitive drive to pull out costs in production as aggressively as possible, using our ability to wield machine tools creatively and cheaply. China Is Not Why America Is Sputtering – Matt Stoller on Substack
In the 1980s, the United States economy moved to finance and transferred power to Wall Street where the easy money is had and the people in power could make a quick buck. All the major industries: housing, healthcare, pharmaceuticals, banking, transportation are controlled by Wall Street. It is but a financial game where the oligarch leaders are the casino dealers and they get to count cards. Sorry for the buzz-kill Donald. Tariffs will simply be a tax on mostly poor people. Price inflation on consumer items will be the only result. The factories are not coming back. We are truly living in the Age of Delusion.
What is really happening, if one looks at the larger picture, is that we are in an economic state of Technofeudalism as outlined in Technofeudalism: What Killed Capitalism by Yanis Varoufakis. Big data now dominates our lives and we are unknowing serfs volunteering our time and energy for the oligarchs who rule the day. Pretty fair assessment. Yanis Varoufakis solutions are a bit overidealistic and impractical, but his birds-eye view of our modern economy is right on. Very chilling.
Another of Donald Trump’s deplorable initiatives is deporting migrants, many whom are in the U.S. legally, and most who do not have a criminal record. Most are here to simply work, make $15-$20 an hour and send some money back home. This is all more than ironic as Mr. Trump is a convicted felon. Our supposed free press has done a deplorable job investigating Trump’s businesses hiring practices. It is common knowledge that people who do the grunt work in hotels, real estate and golf courses are often recent immigrants, often undocumented and living in the shadows. Where are you New York Times and Washington Post? It’s pathetic.
Local Politics
When you visit San Francisco this summer, you may be surprised that there are less unhoused people on the streets. Major Daniel Lurie has done a fine job getting them out of Civic Center, 5th Street and Market Street areas. Often times they do end up getting services and he has been creating more beds. Sometimes the homeless simply move on to the next neighborhood. The Mission District around 16th Street has had a new influx of unhoused people. Indeed, they have made it five miles south of downtown all the way to the sidewalks of the Excelsior District where they camp out on a sidewalk with a fifth of something strong and a cardboard sign pleading for mercy. We have seen this playbook before. However, I do give Mayor Lurie credit. The Civic Center is free of tents and Park & Rec are there with some cool games to play.
Jerry Day in McLaren Park is around the corner on August 2nd
Sporting News
The Golden State Warriors made it to the playoffs but were trounced by the Minnesota Timberwolves. Steff Curry was injured. the team is getting a bit older and without the usual depth. As the saying goes: you can’t win them all.
AT&T Park where the SF Giants play
As of this writing, the San Francisco Giants are playing well and just 2.5 games behind the Dodgers in a tough Western Division.
Author Paul Lyons and Trumpeter Luis Gasca (85 and still doing it)
Road Repairs, Parking Tickets, Do Not Parks Signs and Other Treacherous Endeavors
I recently had to get a new set of tires after just four years for a car that rarely leaves San Francisco. Many of the roads in San Francisco are terrible. This is especially true in the less affluent parts of town.. The City tries but it is odd that high-traffic streets like Mission Street get very little love (this was once the “royal highway” where the early missionaries first traveled). It must be pretty high maintenance for the 14 and 49 Mission buses that bounce their way down the El Camino Real. Below are some of the photos of the roads that I took without even trying. There are worse spots on Mission Street. No bueno!
Mission Street in San Francisco in need of repair
Mission Street in San Francisco in need of repair. You could lose you a child down there.
Mission Street in San Francisco in need of repair
Mission Street in San Francisco in need of repair
That is The Quarterly Report – June 2025
Some photos from the last few months.
The Farmer’s Market on Alemany. Where the real food is.
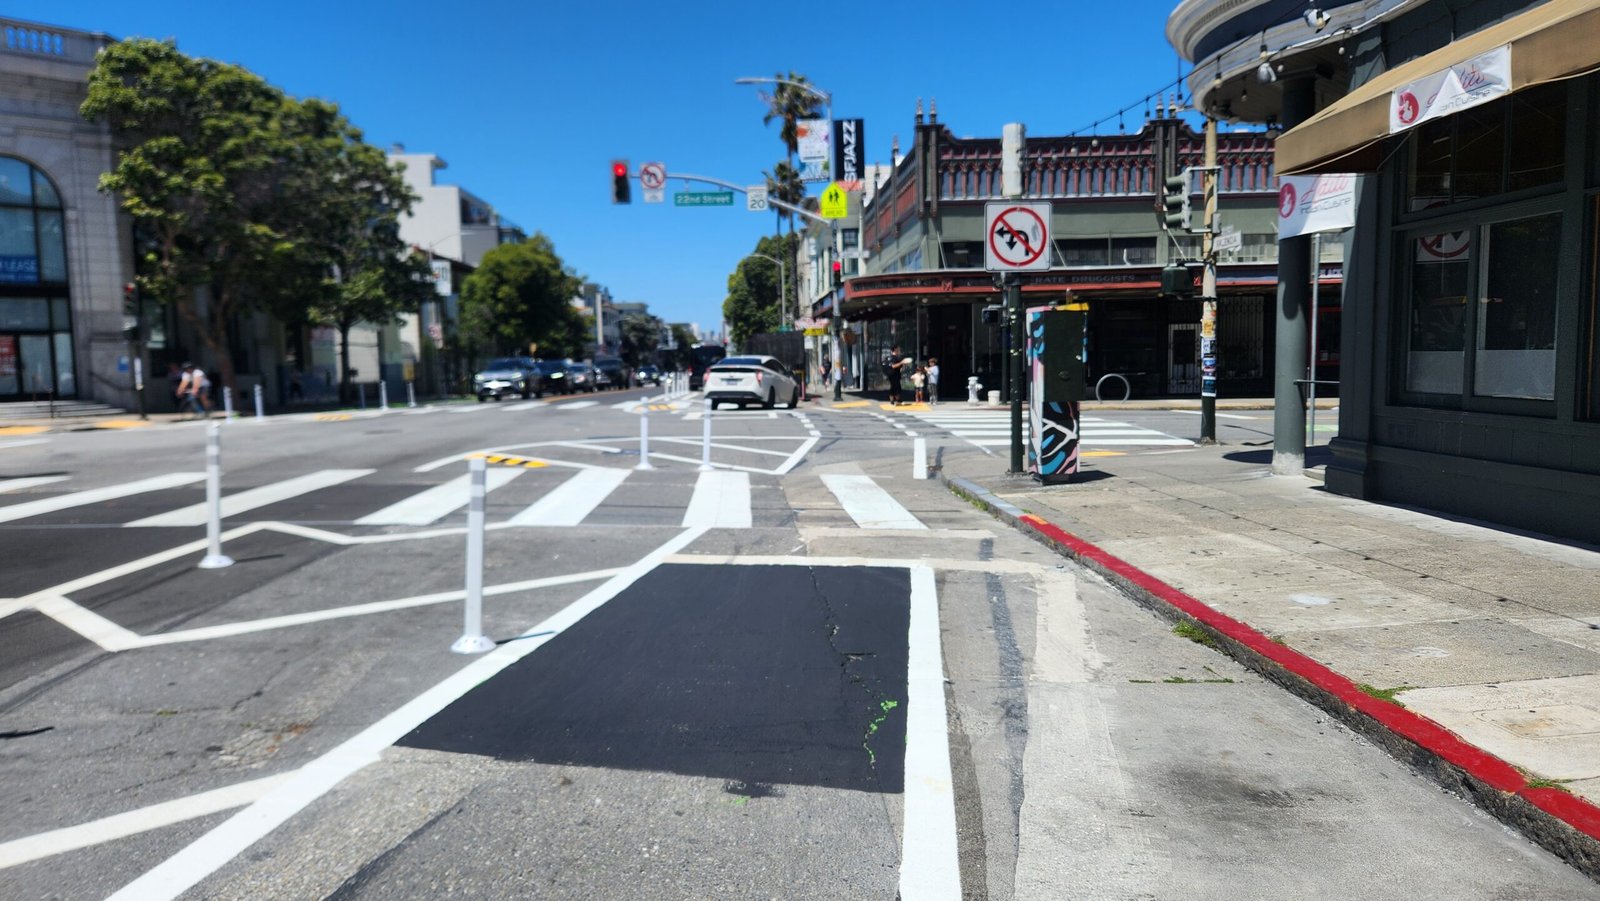
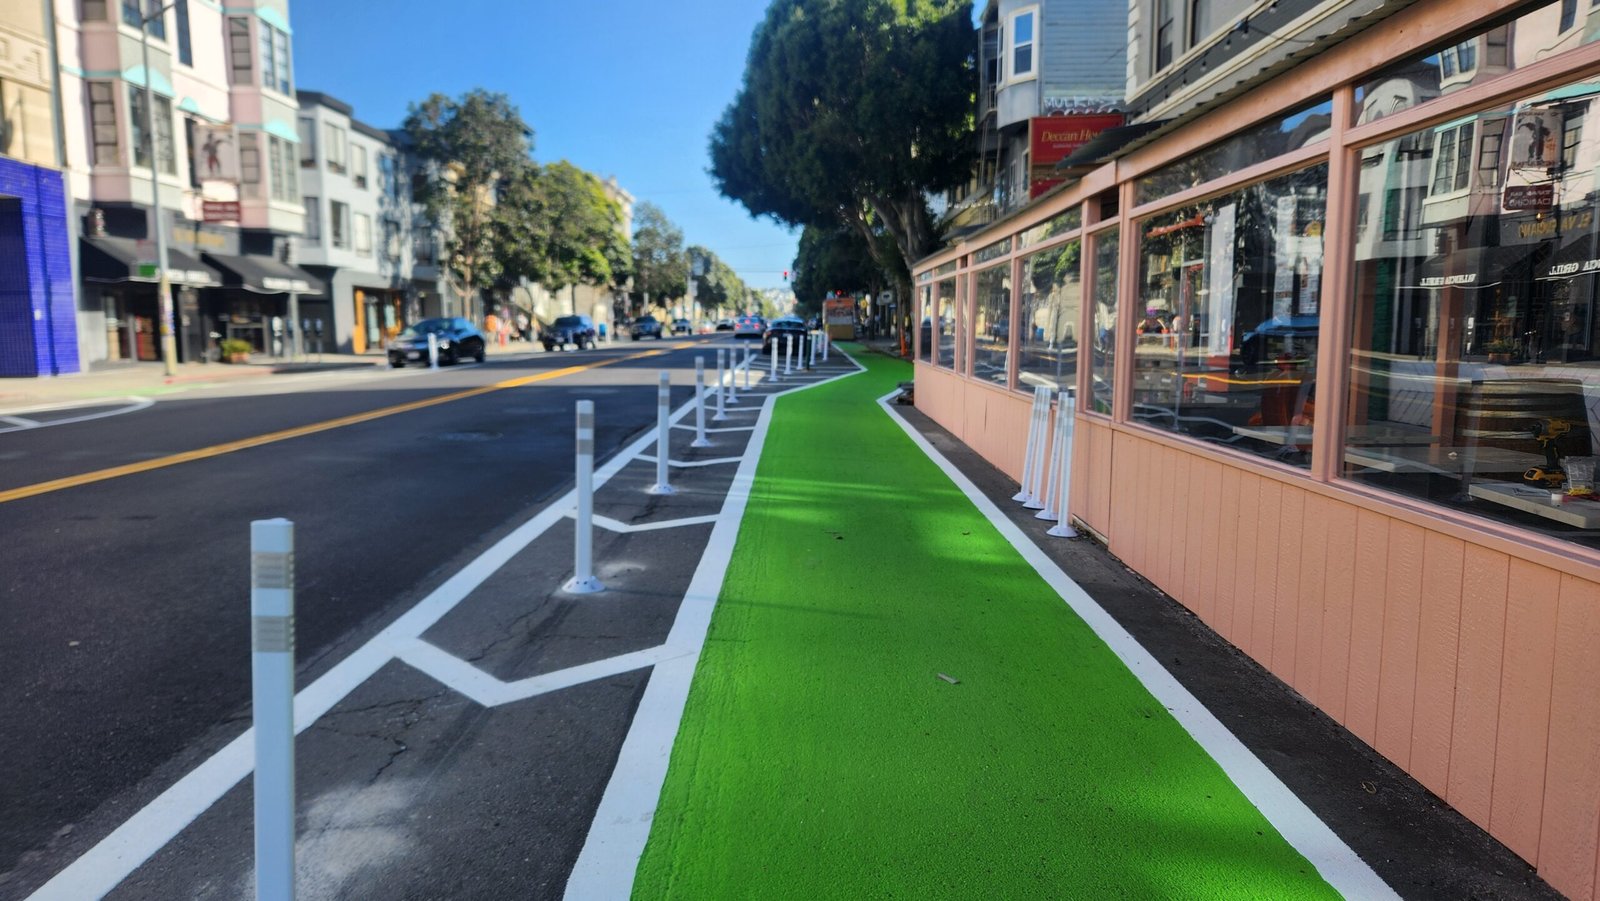
The Valencia Street Bike Lane Project is really pretty much done. They got rid of the ugly silly center lane earlier in March and repaved that part of the road with fresh blacktop. The bike lane now zig zags around parklets. Cars have to park further into the street (I like it how now car folks need to watch out for the bikes when walking to the sidewalk – the narrative is flipped). Also, there is plenty of space for cars to drop off people. This is the plan that I thought would work best a few years back. It is like how the bike lane was implemented originally at 14th Street. Bravo!
With the advent of the Great Highway closure and Sunset Dunes Park at the beach, San Francisco is becoming a fine bicycle town.
Cars are still getting use to the bike lane. This driver thought that green zone means that is where you park.Valencia at 22ndValencia at 21st. As bicyclists we are use to going around stuff.
Valencia Street Bike Lane looking south at 22nd Street
Valencia Street Bike Lane looking north at 22nd Street
Tools Needed
Phillips head screwdriver
Needle nose pliers
1 ½ inch scraping tool
Rags
Dish soap
Garden hose
Optional: Wet-Dry shop vac
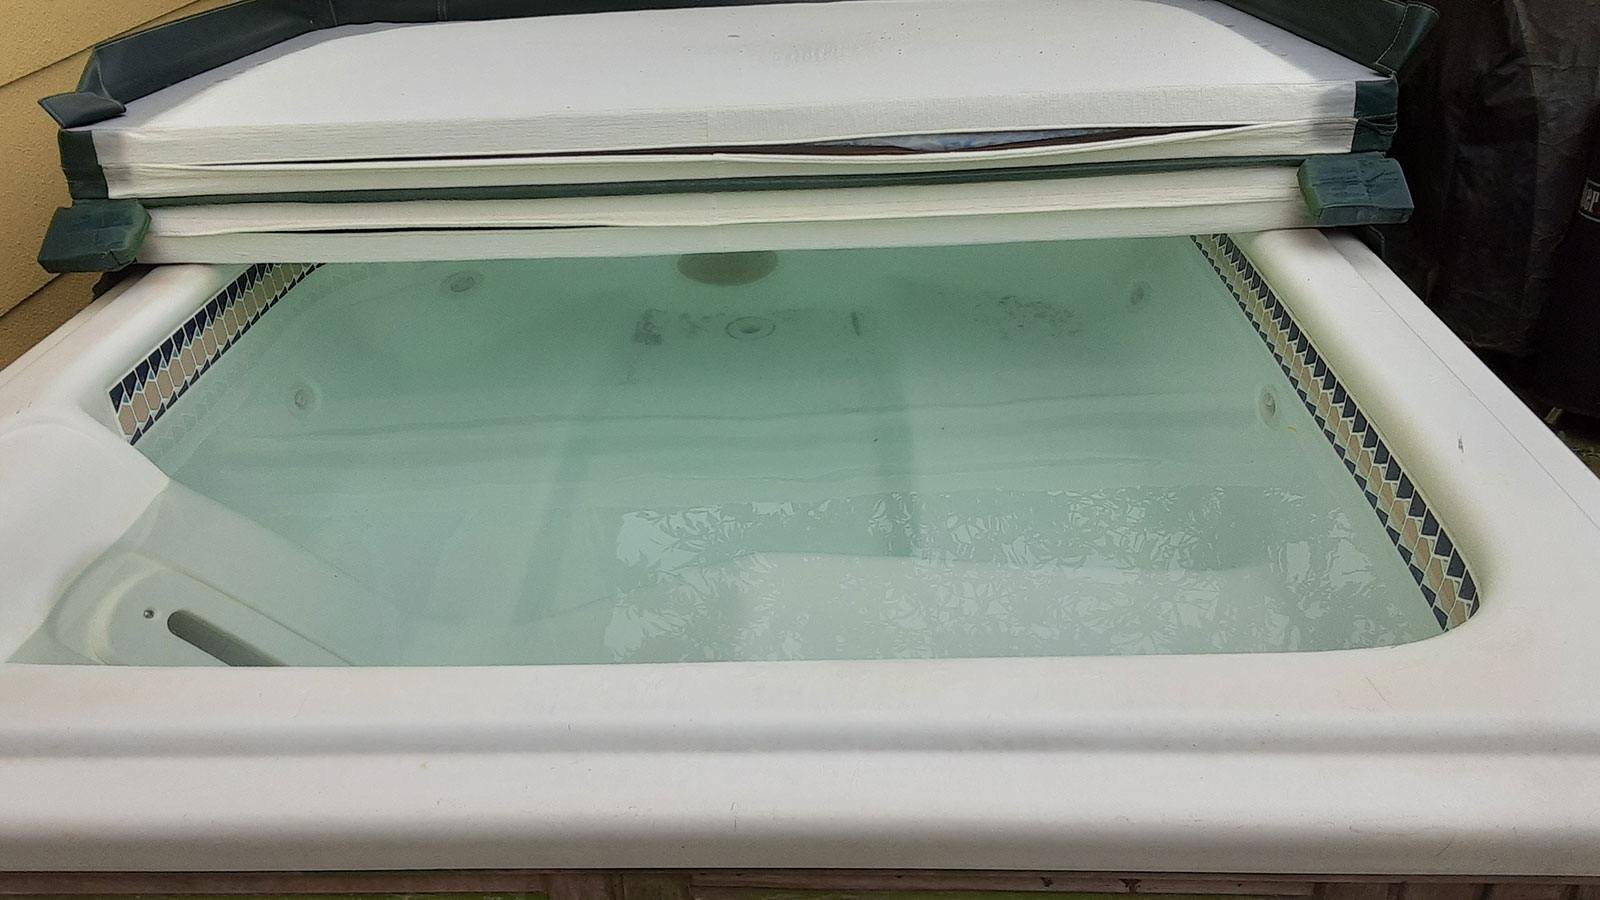
Your hot tub may be very different. This is the only hot tub I have every owned. It is a Hot Springs hot tub from 1987 that was given to me fifteen years ago by a good friend. It still works great.
I change the water probably twice a year depending on use and the condition of the water.
You can simply empty the water and refill, but I find that going the extra mile with the cleaning really helps the quality of the water.
Step 1
Unplug the hot tub.
Step 2
Connect a garden hose to the drain pipe Open the valve. Empty the water directly into a drain. The water is not meant to water your lawn or a garden. The bromide will kill you grass.
I often drain the tub at night as it does take a few hours to drain.
Step 3
Bail out the rest of the water. I often find that the wet-dry shop vacuum works well.
Step 4
Unscrew the plastic fittings holding in the screens. Use a 1 ½ inch tool. I use a scraper wrapped in a rag. Carefully clean hair and lint out of screens with a toothbrush and under a faucet.
Step 5
Replace screens and screw plastic fittings back in. Be careful. This is an old hot tub.
Step 6
Wipe down the hot tub with a rag and a bucket of water with dish soap. Wipe with clean water.
Step 7
Use shop vac to suck out all remaining water. Do a final wipe down
Step 8
Close drain valve and put cap back on
Step 9
Fill hot tub with the hose
Step 10
Plug hot tub back in and start jets. Let run for around 10 minutes.
You are done! It will take 24 hours to fully heat up.
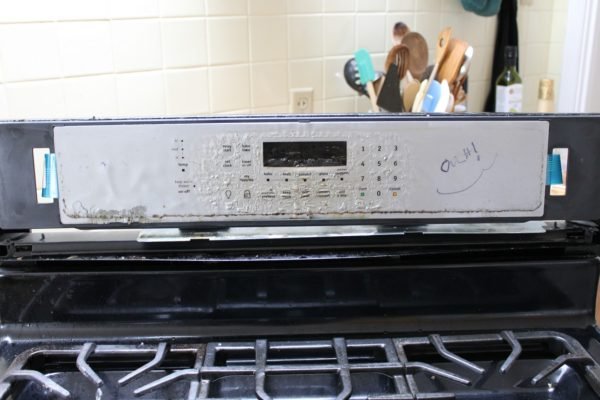
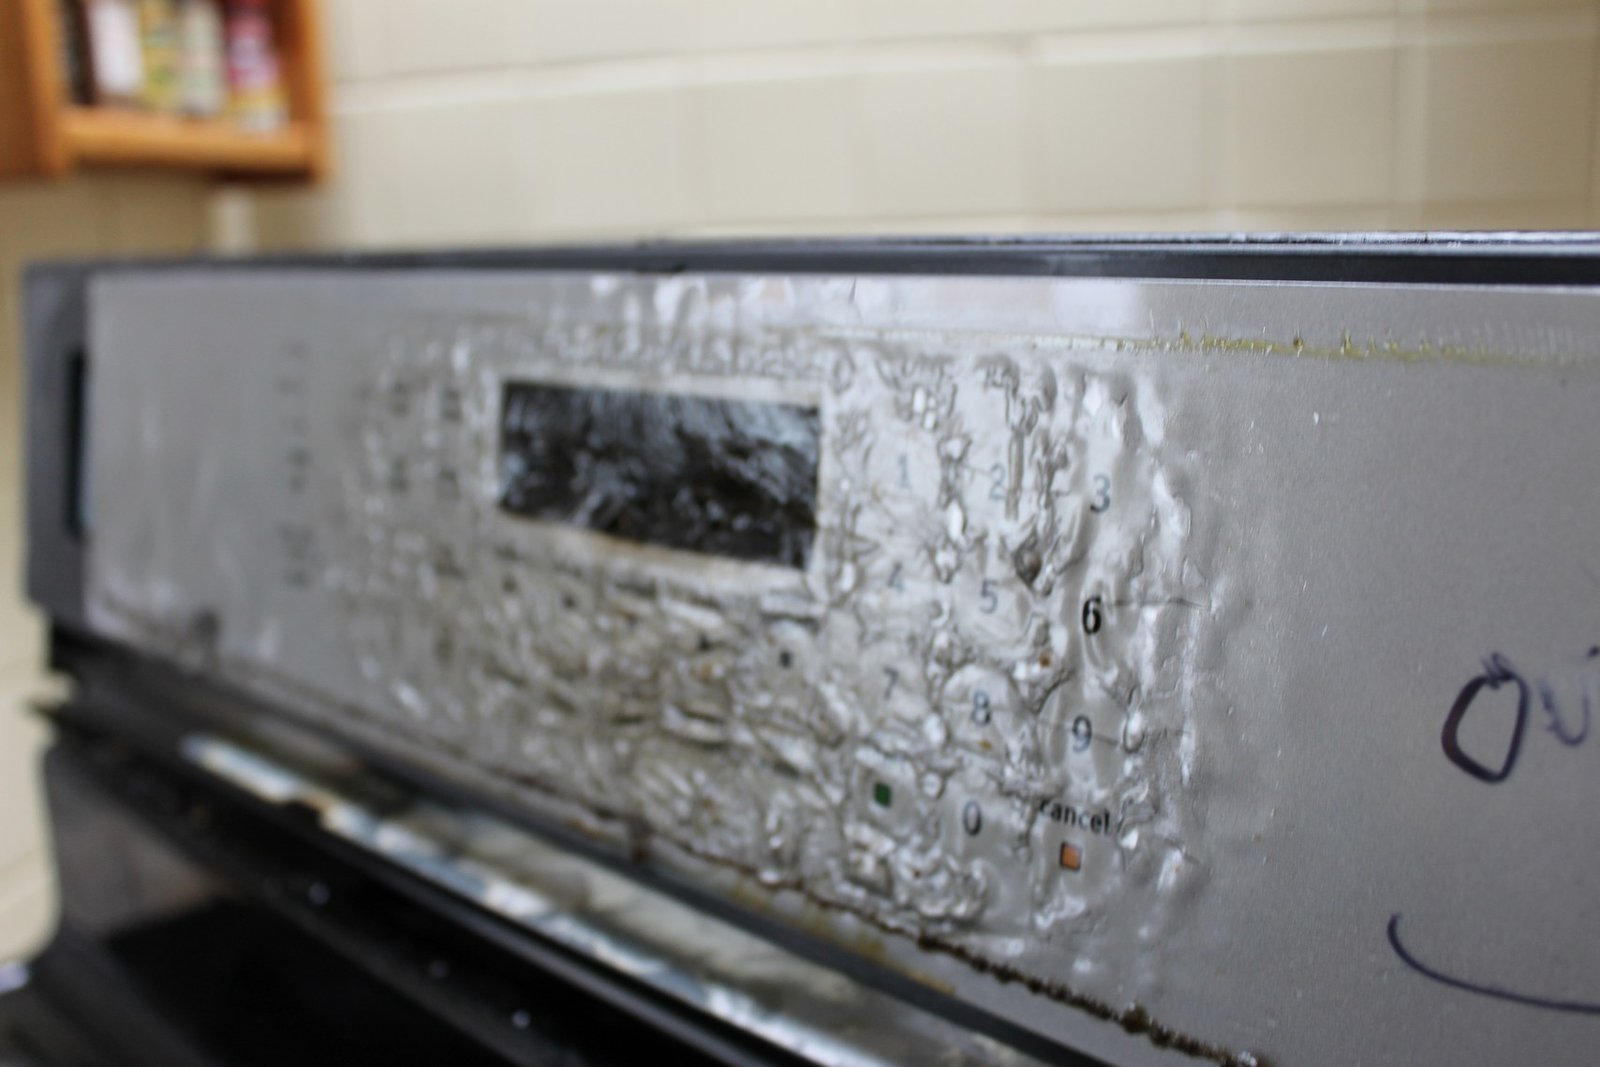
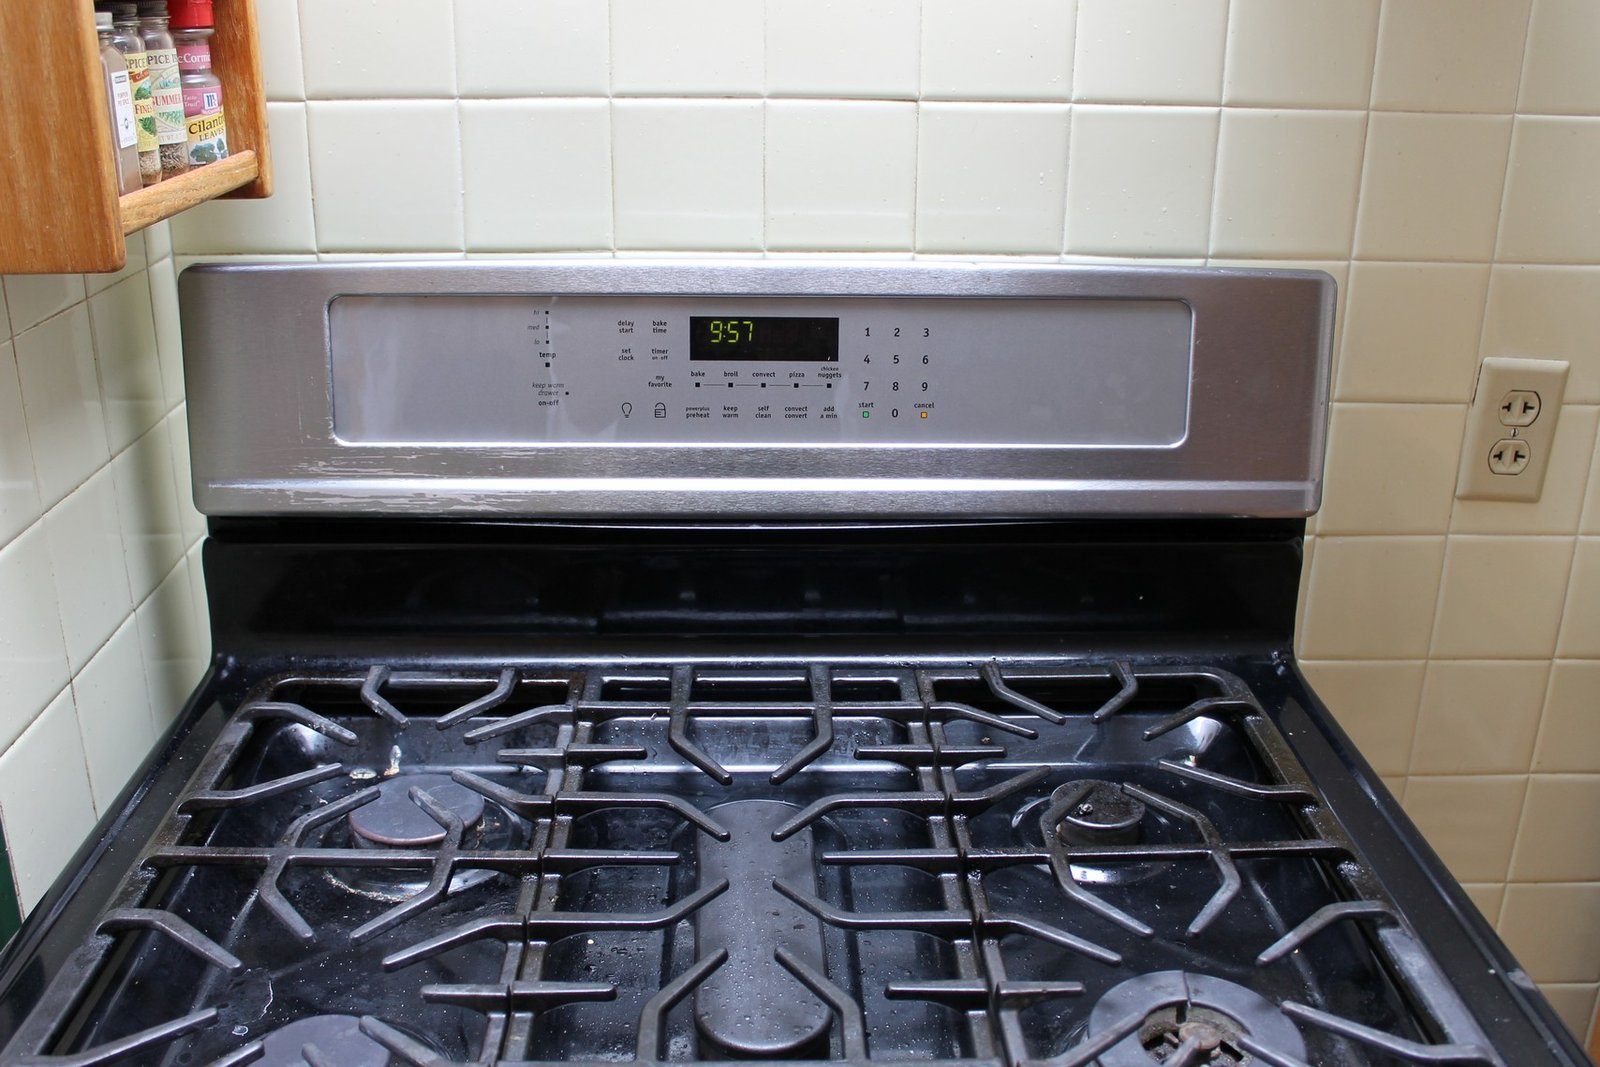
It happens. Someone in your house made a pot of beans, soup or maybe some pasta and the lid ended up steaming and melting the front or your incredibly poorly designed high-tech stove. They may even have rested a hot lid over the control panel, called the membrane or overlay . If your stove looks like the photo below there is hope.
Stove from the front after I had already taken the top off.
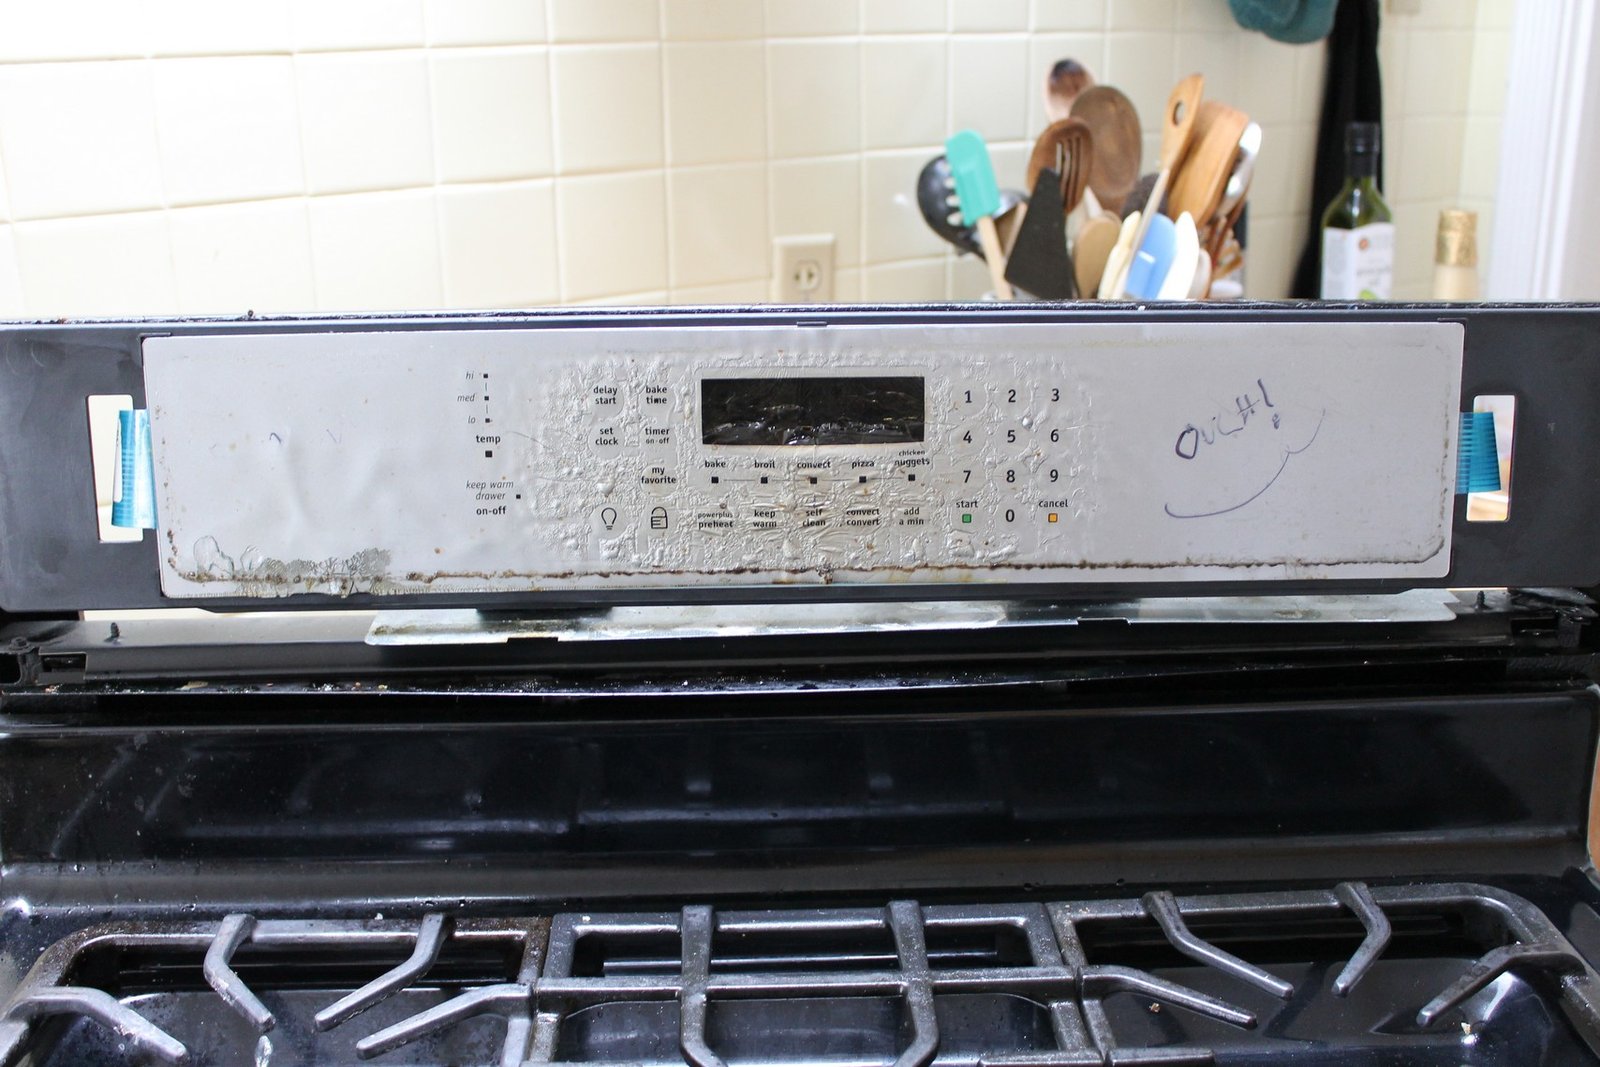
It is possible to replace the front control panel of the stove. It will cost around $150 for the part and about an hour of your focused attention mostly with a screw driver. Make sure that the clock still has a working light. If the clock is fried you may be totally out of luck.
Stove control panel fried
After top taken off.
After taken off
From the back
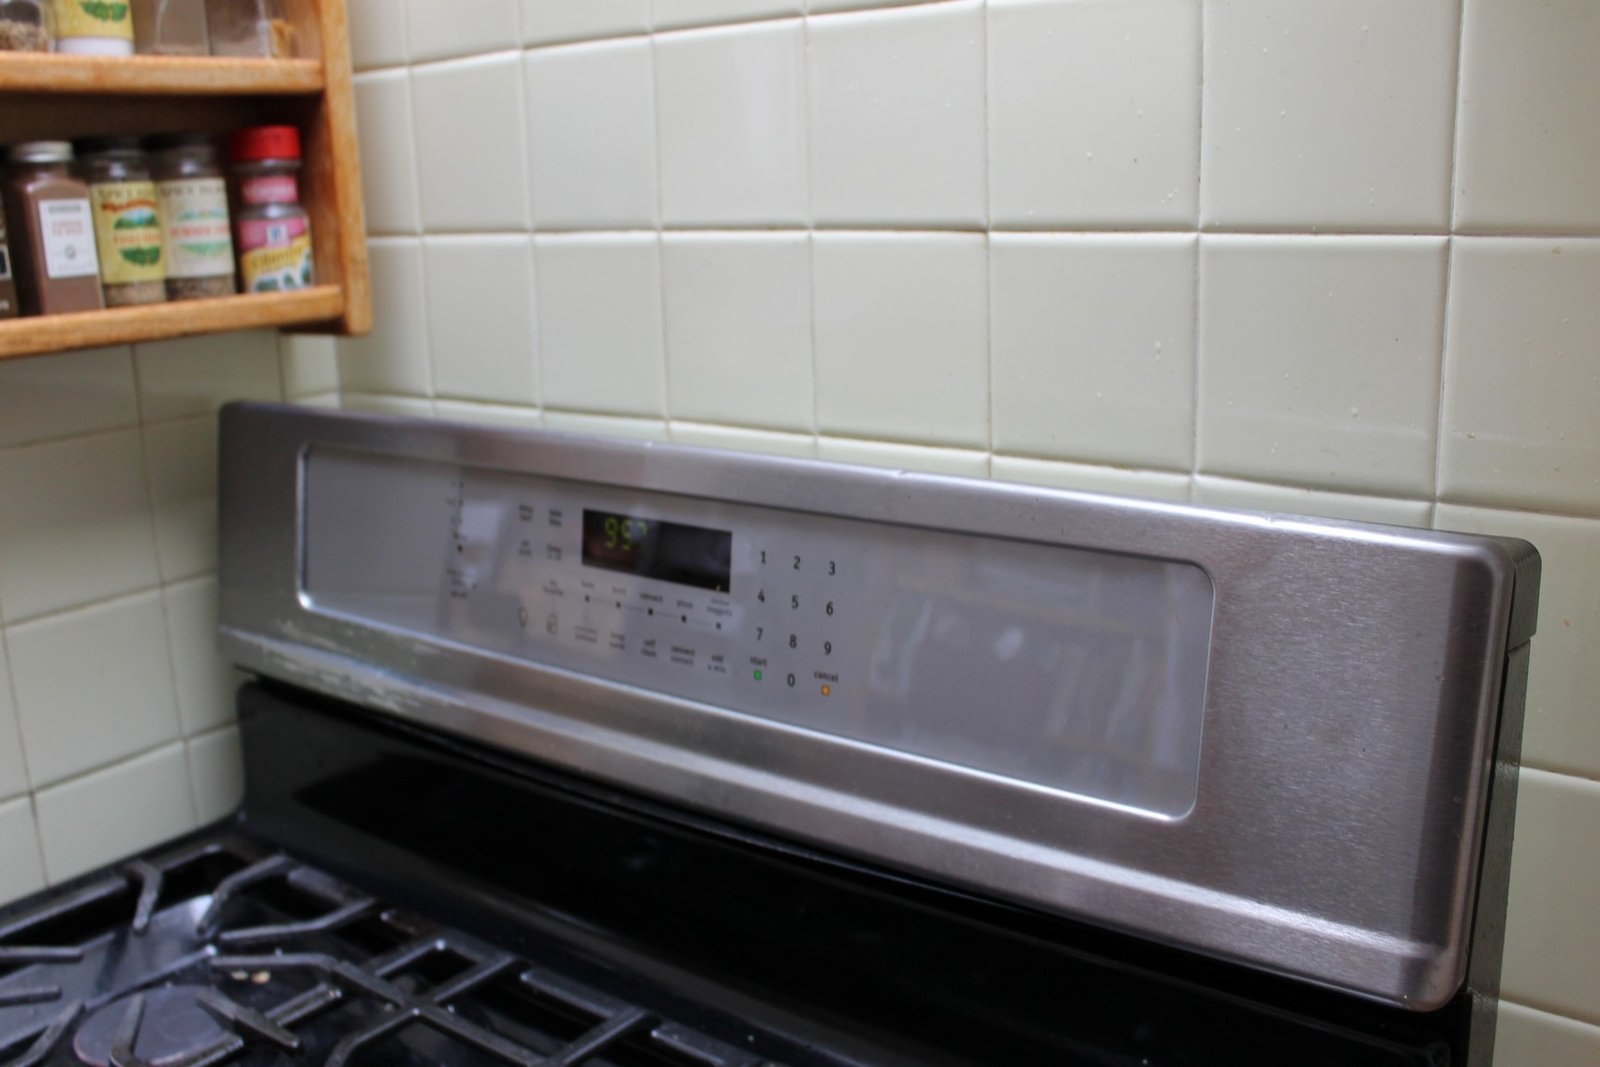
With the new front on
Replaced
After repair
STEP 1:
Find the part online. Get the exact model number of your stove and enter it into an internet search engine along with words like “control panel, stove front, overlay.” Mine was a Frigidaire. Do not buy a part unless you are absolutely sure you are getting the correct part.
STEP 2:
Wake up the next day after you get your part in the mail. Make a strong cup of coffee. Make sure you have plenty of light.
Stove control panel fried
STEP 3:
Assess your stove. Determine of there is light coming from the clock. Do not play around with the melted overlay. Unplug stove. Pull it out from the wall. Take some pictures of both sides for when you put it together you may get some valuable historical data.
STEP 4:
Find the screws that hold the front on which will be on the back. Start unscrewing putting all screws in a little cup..
STEP 5:
Pour another cup of coffee. When you get the back and metal top off, assess the damage. If the computer board from the back looks like it is melted I would figure out how to return the part you just bought and start shopping for a new stove.
From the back
STEP 6:
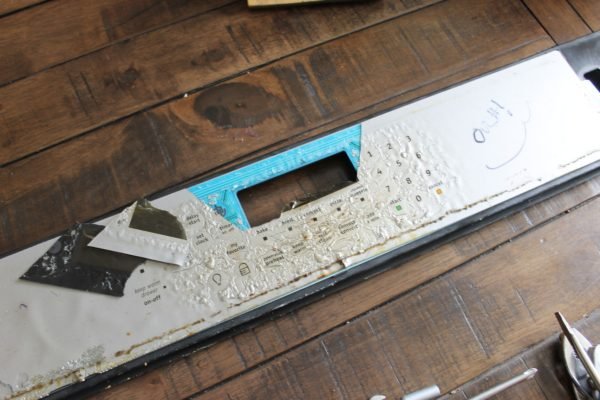
Pull the old control panel cover off. Probably some more screws. At one point mine was so melted I had to carefully cut it off with a razor blade as it was melted together.
After taken off
STEP 7:
Put the new control panel on. Connect to the computer board. Mine looked like a large flat ribbon. (I used some blue painters tape to hold the overlay in place while I plugged it in.)
STEP 8:
Cross your fingers.
STEP 9:
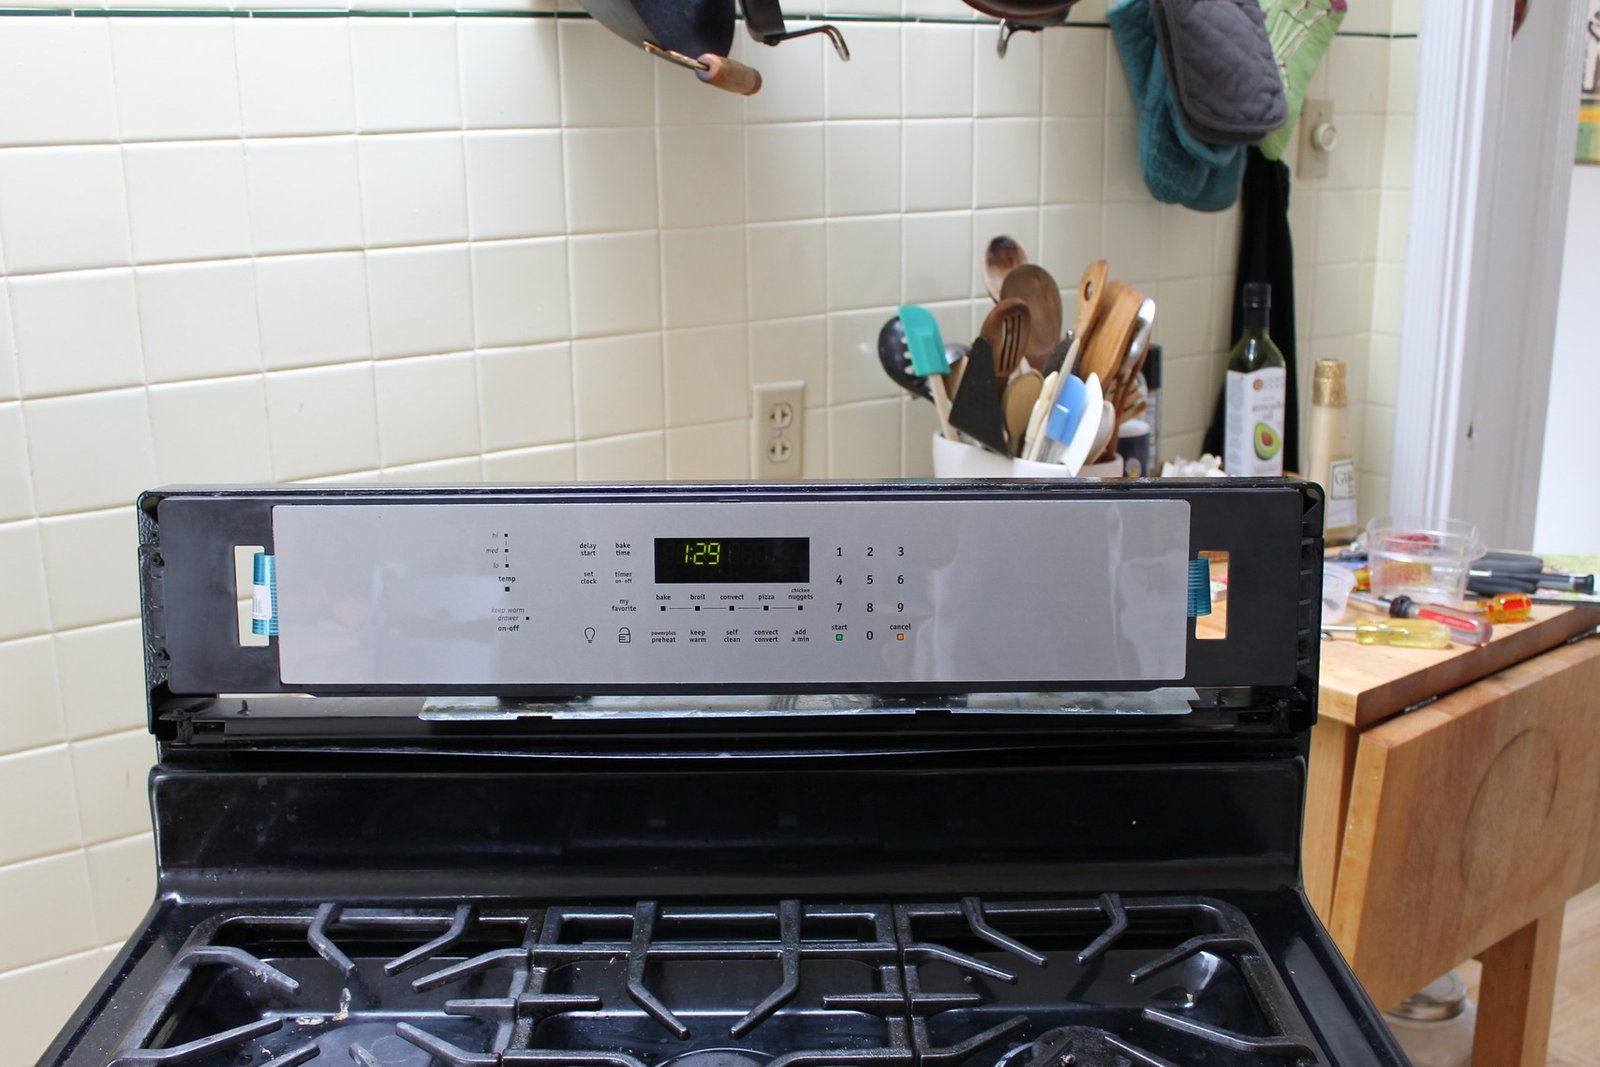
Plug in the stove. You should see the clock start up and show 12:00. Peal off the plastic protective stuff on top of your new overlay.
STEP 10:
Connect all the screws in all the places that you just took out twenty minutes ago to the top and back covers.
You just saved yourself at least $300 by not having to buy a new stove.
Disclaimer: I do not guarantee that you will be able to replace this part successfully. I was able to swap out the part and the stove has been running fine for about a year. I was actually surprised it all worked out.
Replaced
PROLOGUE
Our appliances, like all technology, are based on the generation and times that they are made. The stoves built in the 1960s were built of metal, chrome and glass. They often had mechanical clocks and timers which after 20 years would sometimes fail. The front of the stoves were often made of heat resistant glass. Over time these stoves did wear out but many are still in operation today and look great. Kenmore stoves from this era were like tanks and designed very well.
Contrast that with what $600 will get you in a stove today. The contast in workmanship and materials is almost shocking. Today they are designed poorly and of cheap materials made to wear out and fail. Appliances were made better in the 1950s and 1960s. Why today engineers and designers have not realized that having plastic control panels near heat surfaces is not a good idea, I will never know.
STEP 11:
Make a huge dinner and invite your friends over for a feast.
If you are looking for a job, any job, and want to work steadily for the next 20 years, become an appliance repairman. Ever since the good ‘ole US sent the manufacturing overseas and the big companies maniacally focused on quarterly profits, the quality of the appliances has diminished. Bad engineering. Cheap flimsy parts. Lousy workmanship.
Superhuman effort isn’t worth a damn unless it achieves results.
Ernest Shackleton
In 2012, we bought new appliances. The old ones had lasted 13 years. The dishwasher died. The stove and fridge were pretty beat up. Time to get new stuff. Because of the size of opening in our fridge, we got all Fridgidaire units, a package that cost around $3000 after warranties and taxes. We have had problems with every appliance but the most troublesome has been the fridge. When the fridge has problems, it is unlike the other appliances as food is going to go bad. My Fridgidaire model is the Fridgidaire Professional 21 HA20412058. They should have named it the Fridgidaire POC (Piece of Crap). How they put “Professional” in there is baffling. Even the doors do not close properly.
So here is my advice when buying any appliance in 2014, especially a Fridgidaire Professional 21 HA20412058 refrigerator.
Get the best service warranty offered. We did and it was a really good idea. After a year when the first one expires, buy the extended warranty. You will need it.
Buy a large camping cooler and know where the best place in your neighborhood is to buy ice. After 6 months and your “frost-free” fridge looks like Earnest Shackleton’s view out his tent on his South Pole expedition, you can be assured that in about a day you new fridge will be at 65 degrees.
Buy a hairdryer. You will need this for defrosting your fridge.
A ¼ socket wrench and extension. That is all you will need to open up the back of the fridge and defrost this piece of crap.
Buy an appliance thermometer.
If you begin to notice your fridge is frosting up, you really have about a day, so plan accordingly. Do not do any major shopping. Look for coupons to the local pizza and Chinese food delivery restaurants. Do not plan your trip to the South Pole.
Sir Ernest Shackleton boat Endurance freezer was frosting up. He spent years stranded in the South Pole. Good thing you got a hairdryer. If he had a hairdryer, he could have melted his way out.
STEP 1:
Call your warranty service number. They will tell you they can make it out to your house next March 22nd. Is between 1 and 4 pm OK? Proceed to STEP 2.
STEP 2:
Make sure you have about an hour and a half free and unplug the fridge.
STEP 3:
Empty the main compartment of the freezer.
STEP 4:
Use your ¼ socket and undo the two bolts in the back and the two holding in the ice-maker. Gently pull these out of the freezer. The electrical connection for the ice-maker is disconnected by squeezing on the outside. There is one such connection for the wall in the back too. That way you get both the back wall and the ice-maker, out of the fridge.
STEP 5:
Get our your hair dryer and melt all the frost on the elements. This is actually sort of fun seeing this frost just melt away. Use a towel or dishcloths and dry up the floor of the freezer. Water is your enemy at this point.
The dynamite was of no use. If only I had a hairdryer, I could melt our way out of this mess and free the ship out this icy grip of doom.
Ernest Shackleton
STEP 6:
Notice how cheap and shoddy the construction and marvel at the concept that they got a thousand bucks for this thing. Be gentle. This POC may make it another 6 months. If the mechanical temperature adjustment knob on the back wall that you took out does not click and seems broken because of the frost build up, take those two bolts out and put it back together so that it does not spin freely but clicks and works properly.
STEP 7:
Put the whole thing back together, making sure to connect the two electrical connections. Be gentle.
You are now done. Put your food back in the freezer and plug in the refrigerator. Make sure to have that appliance thermometer handy so that you can confirm that the unit still works.
With the back off. Use hair dryer to defrost.After the job and no frostBolt holding ice maker in. There are two of these.So glad I got the professional model. Doors that don’t close. Frost-ups. Next time maybe I will by the Amateur model for even more senseless humor.
Be ready to repeat this task every six months. Hey we’re Americans! We’re use to living with just 20 acres, a shotgun and a mule. A crappy fridge made in China is just a small obstacle to “living the dream.”